How to turn on location services for facebook
One of Facebook's many features is that you can "check in" from your current location, letting your friends and family know where you are or where you've been. You can also use Facebook to let your friends know where you are right now using the Nearby Friends feature.
If you take a moment to consider what this means, you'll understand that it means Facebook is keeping tabs on your every movement. As The Wall Street Journal recently uncovered, this data is being used for more than just helping you get in touch with your friends.
If you don't feel comfortable sharing your every move with a bunch of advertisers, you can protect your privacy and disable location tracking.
- How to disable location tracking in Facebook on iPhone and iPad
- How to stop Facebook from saving your location history
- How to delete your location history from Facebook on iPhone and iPad
- How to stop sharing your location with nearby friends in Facebook on iPhone and iPad
How to disable location tracking in Facebook on iPhone and iPad
If you want to burn the entire Facebook location tracking ability to the ground. The easiest way to stop it is to disable location tracking for the Facebook app.
- Launch the Settings app on your iPhone or iPad.
- Tap on Privacy.
- Tap on Location Services.
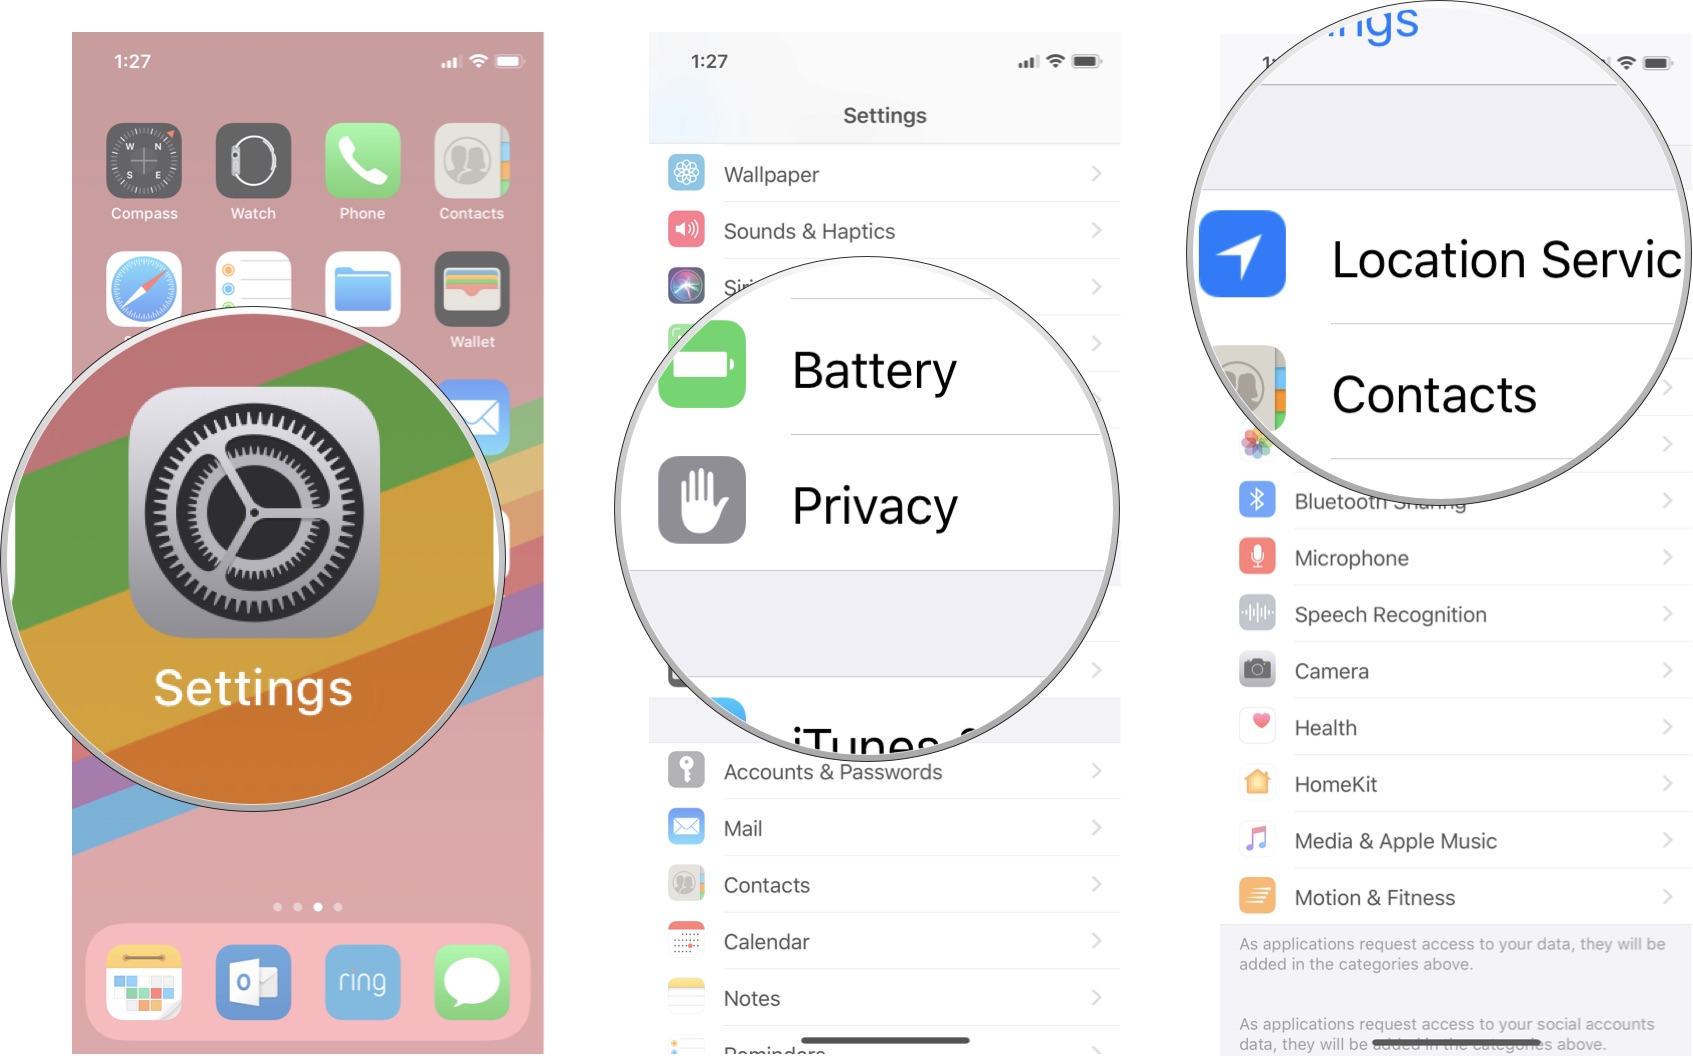
- Tap on Facebook.
- Tap on Never.
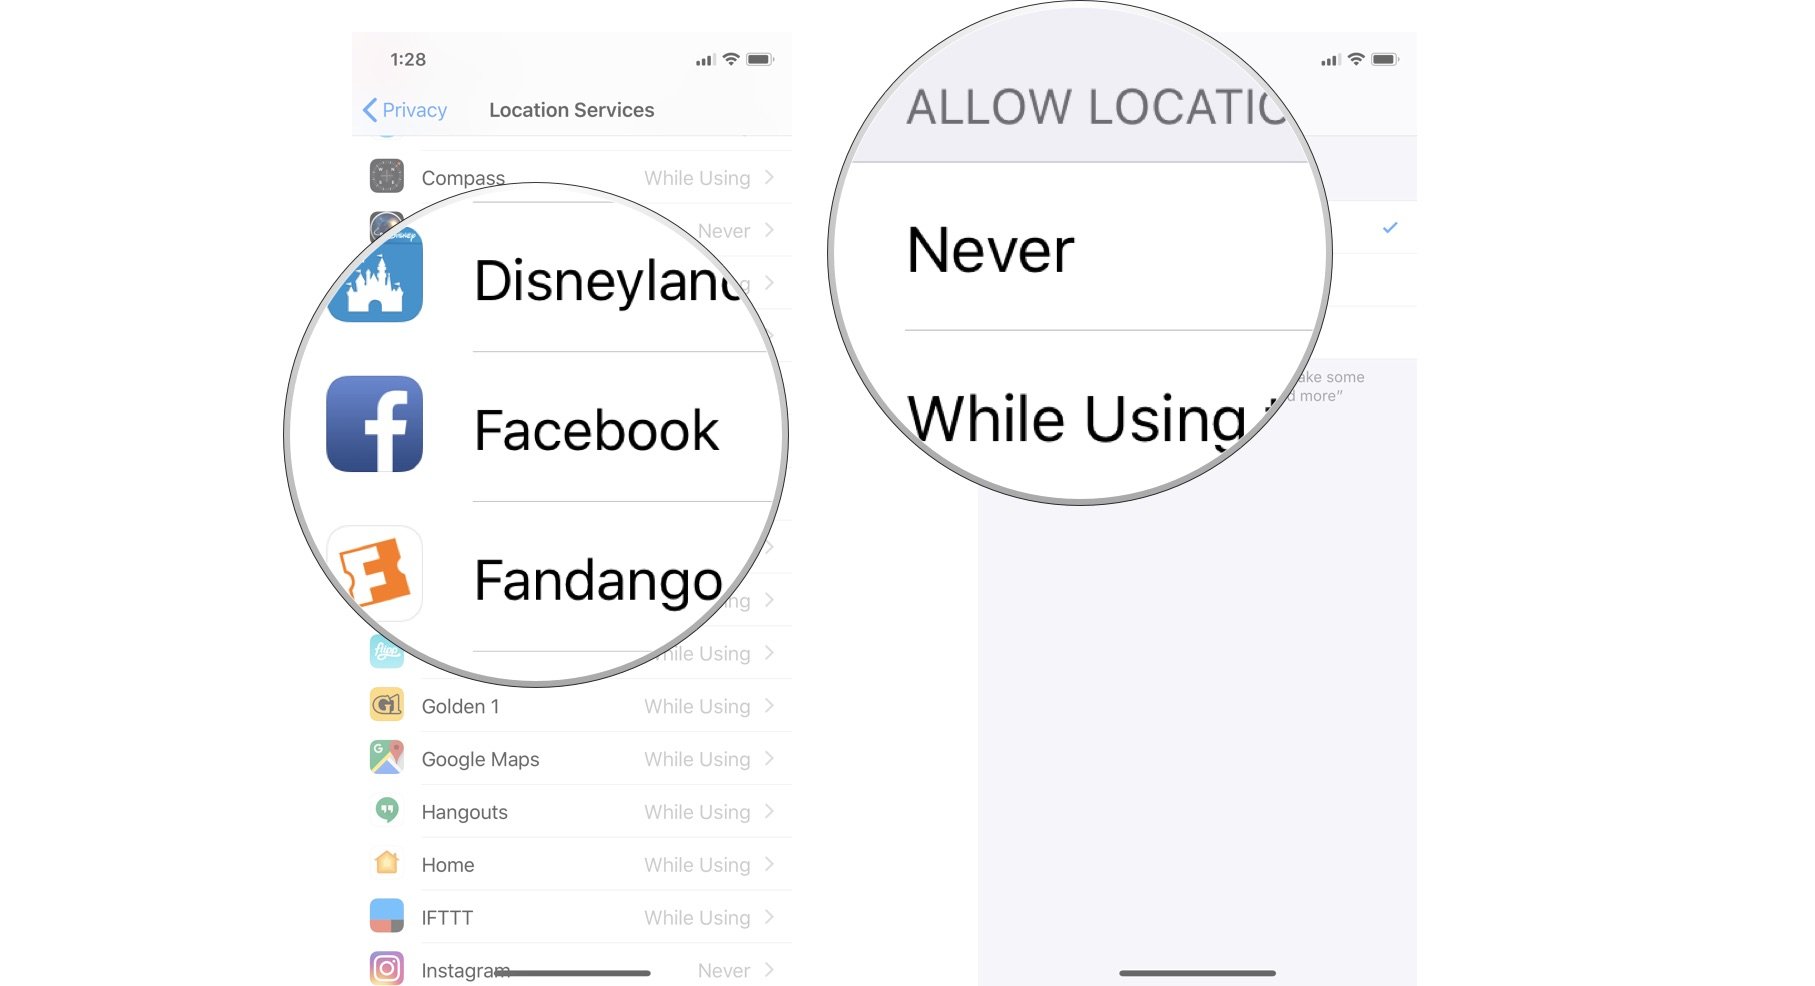
Facebook will not have any location tracking access, not for storing your location history while you use the app, not to let friends nearby know where you are. It's total darkness as far as location tracking is concerned.
How to stop Facebook from saving your location history
Maybe you like the check-in and Friends Nearby features of Facebook and don't mind sharing some of your location data with the company in exchange for those features. You can leave location tracking on (or set it to Only While Using the App) and turn off the history saving part. This is where data miners tend to get the most useful information from you.
- Open the Facebook app on your iPhone or iPad.
- Tap the More tab in the bottom right corner of the screen.
- Scroll down and tap Settings.
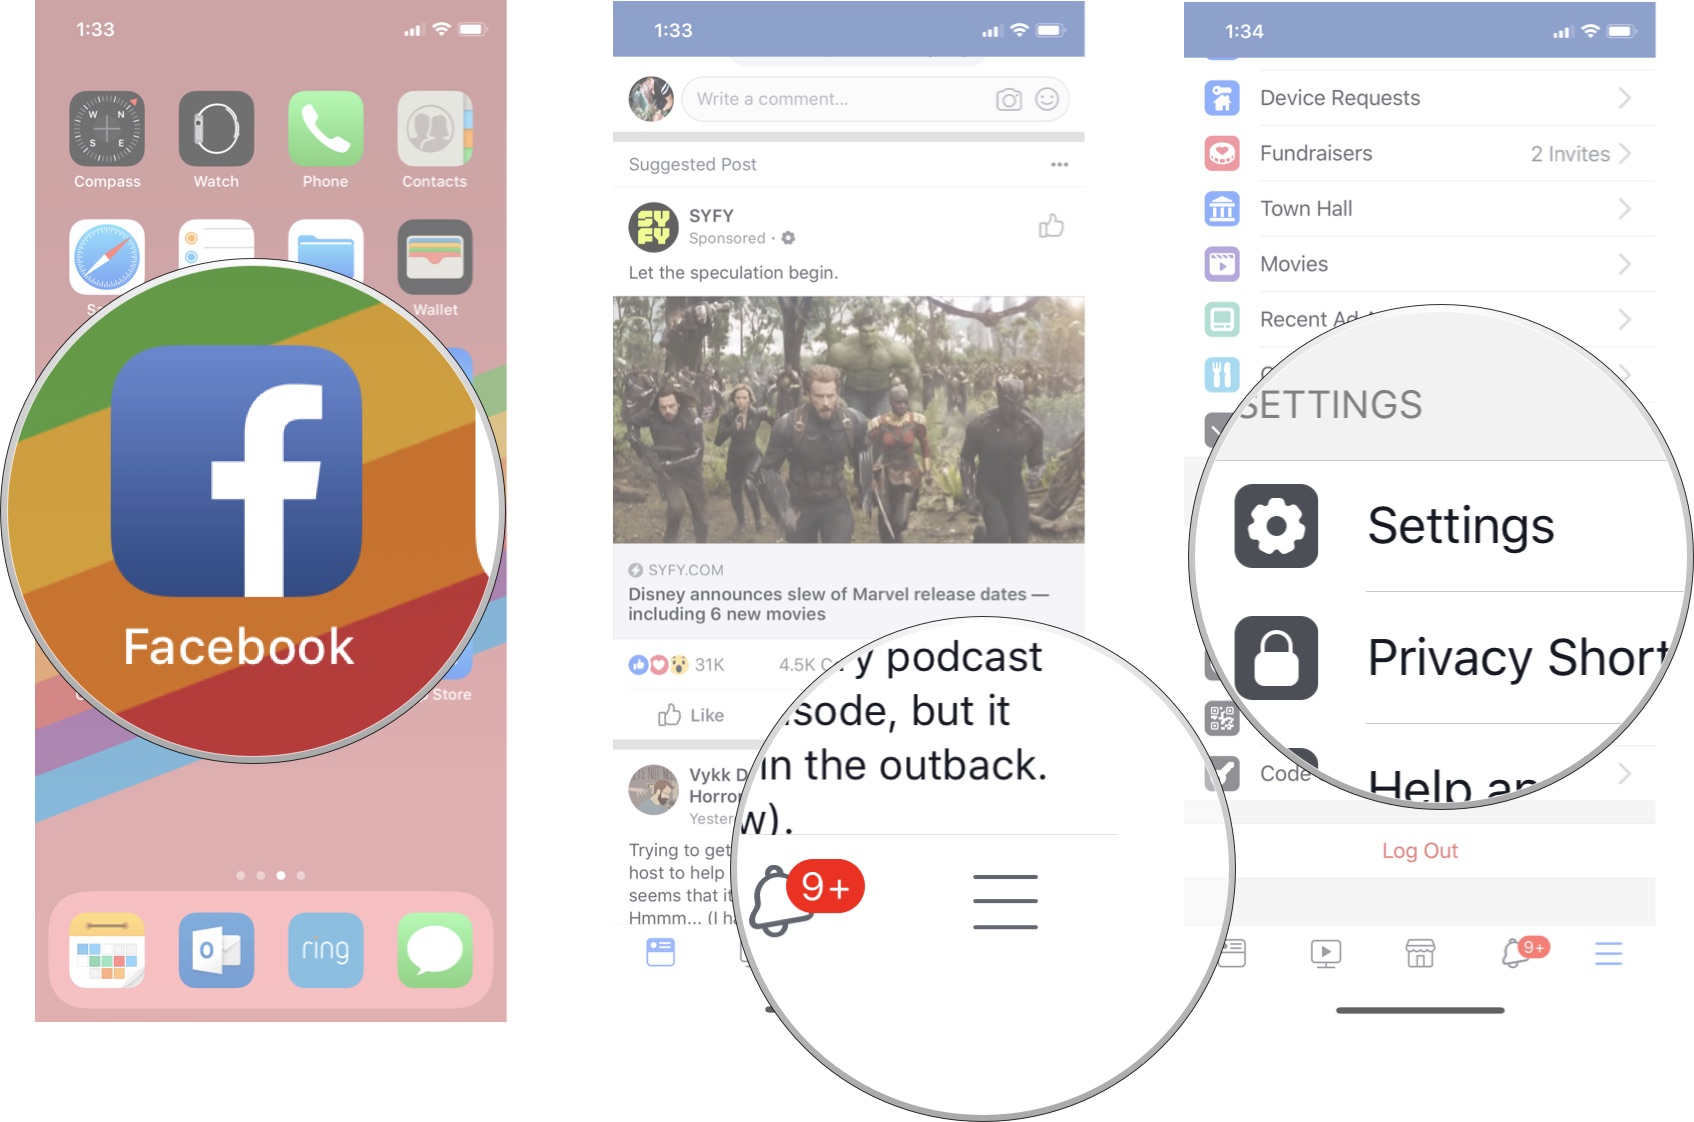
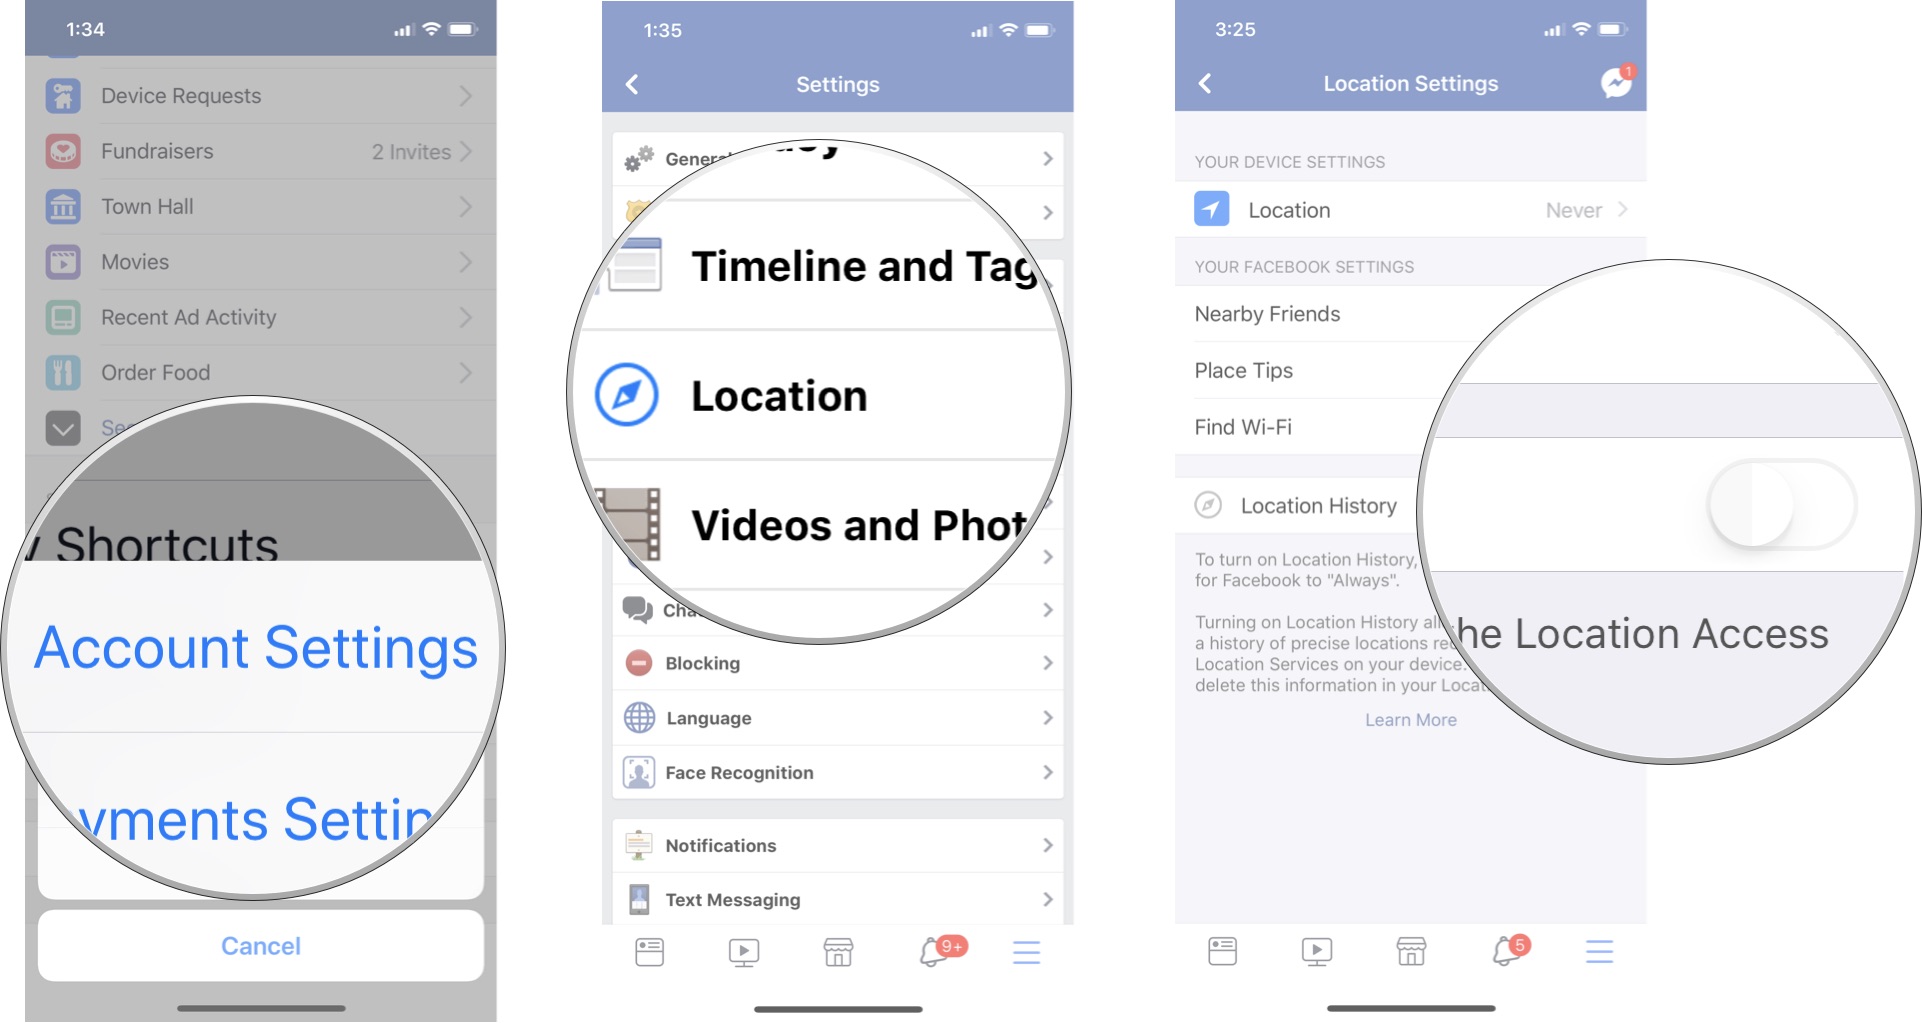
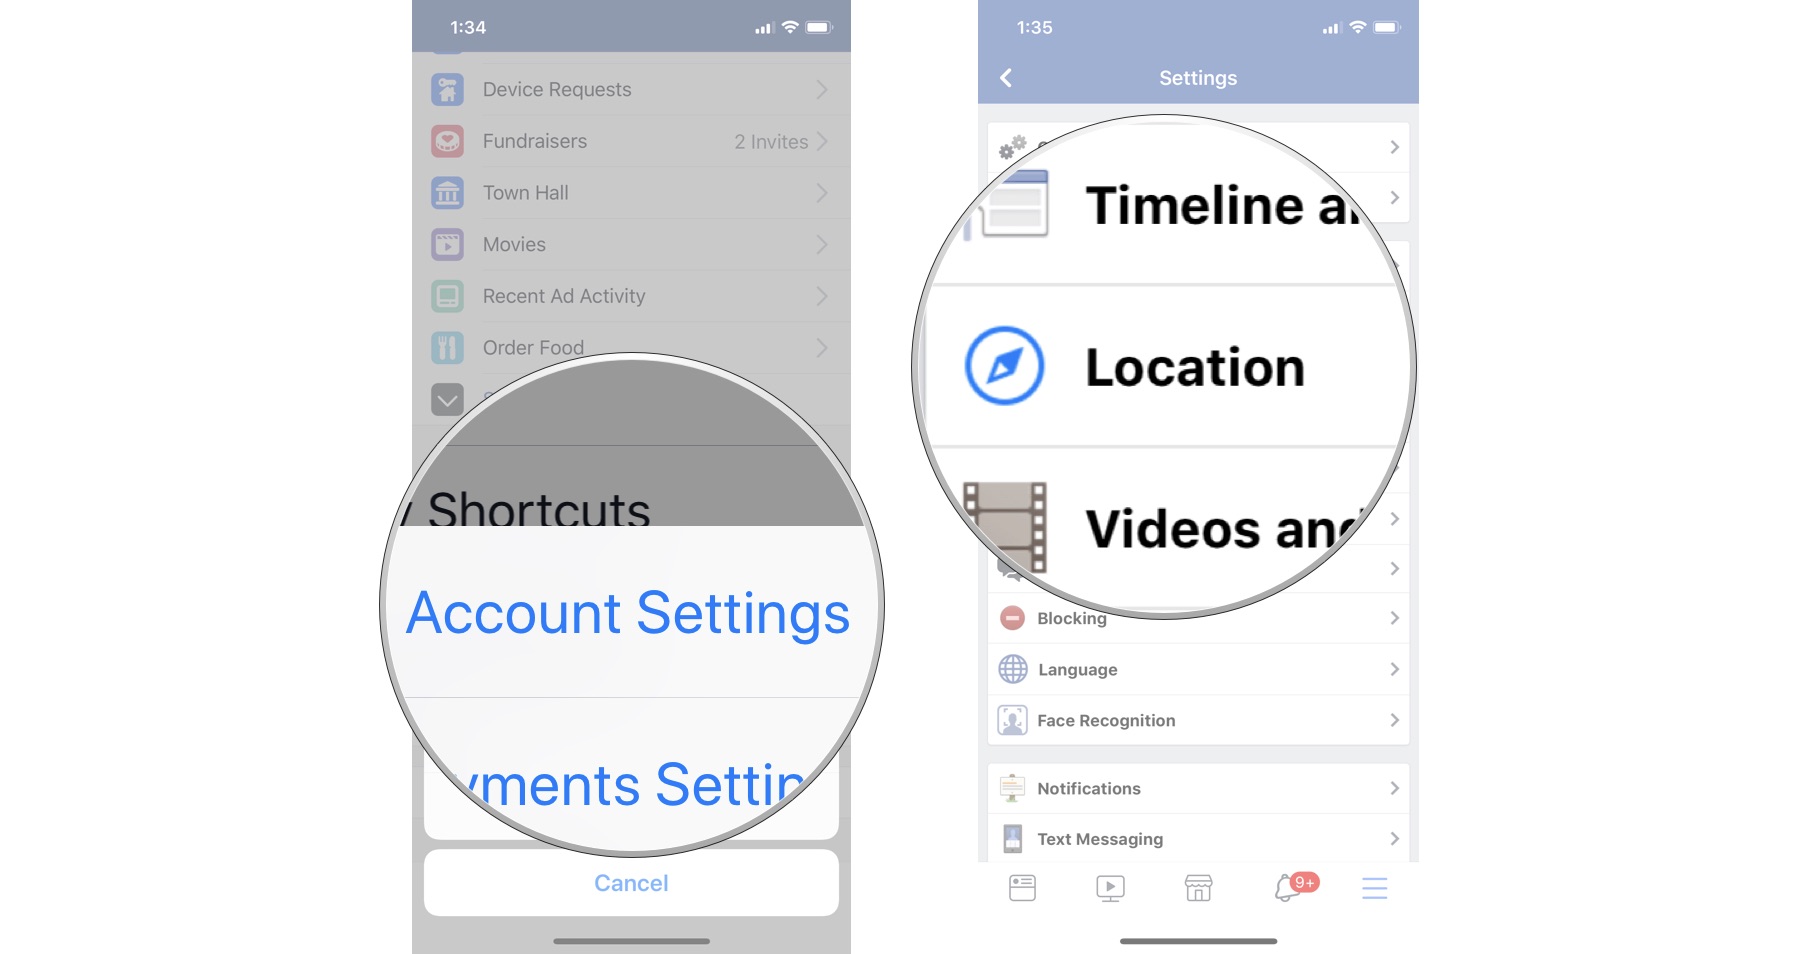
- Tap Account Settings.
- Tap Location.
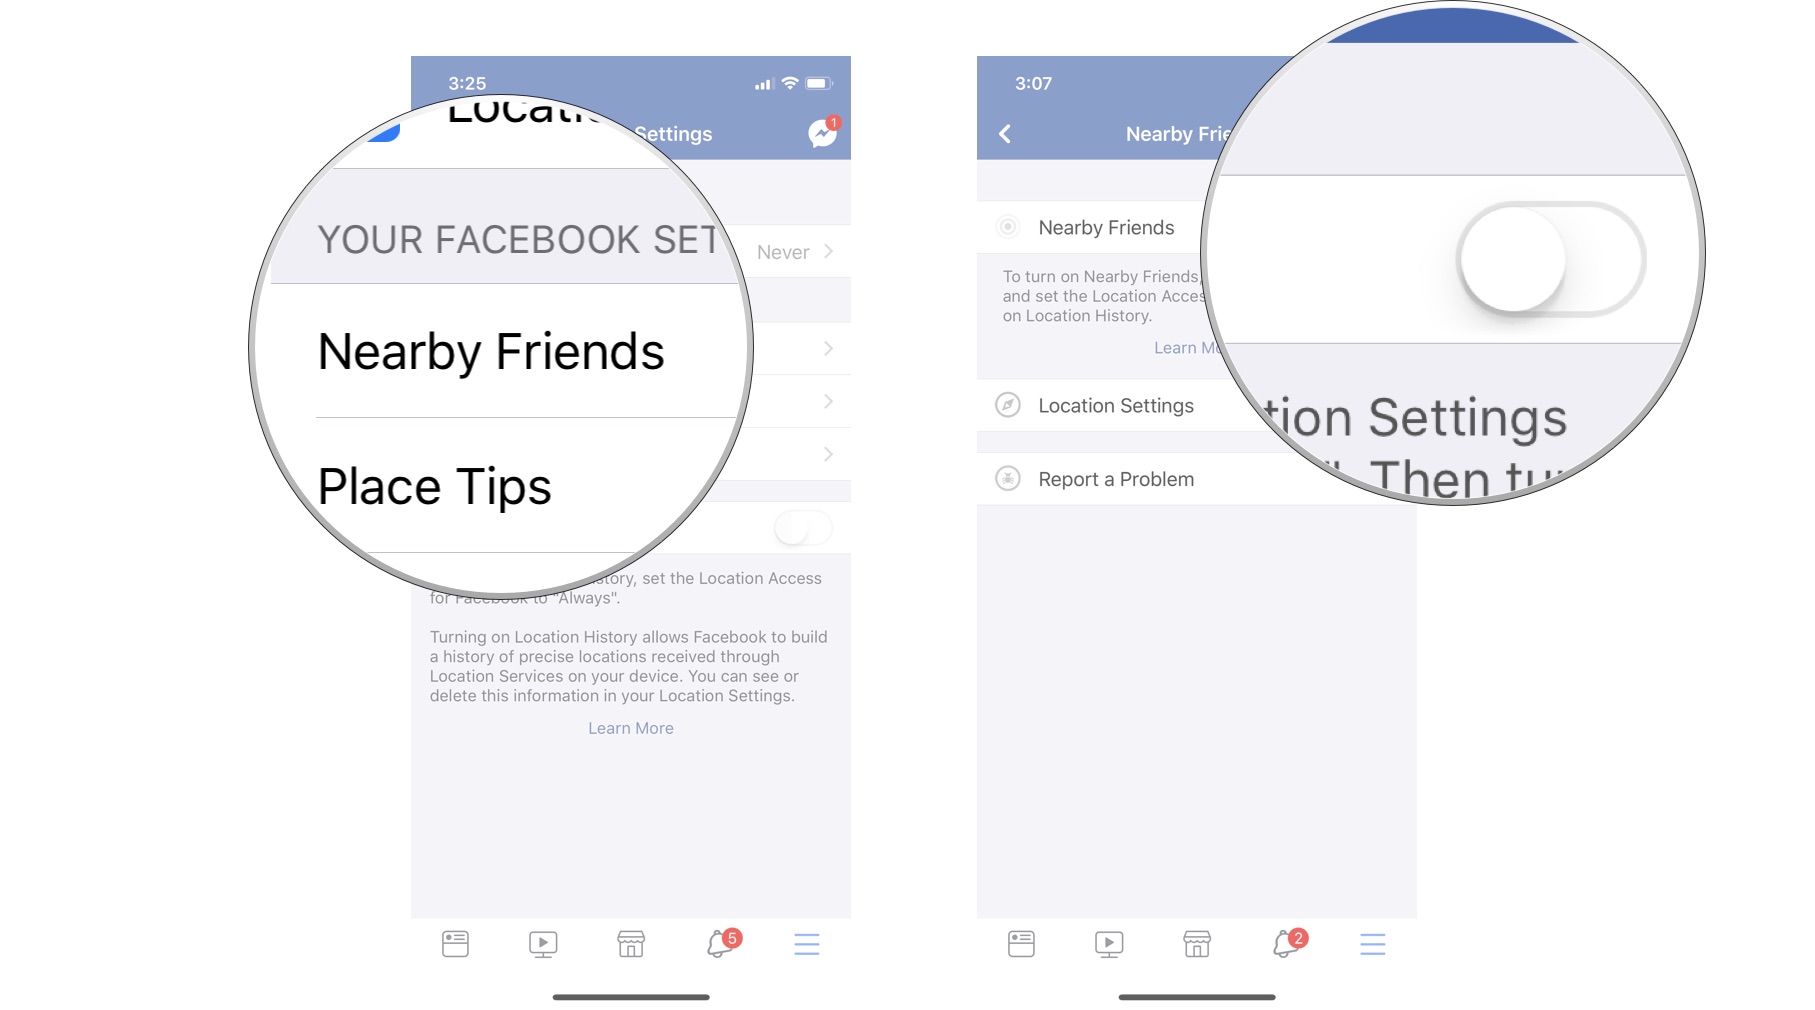
- Turn off the Location History switch.
How to delete your location history from Facebook on iPhone and iPad
If Location History has ever been enabled on your iPhone, that history is stored with Facebook. You can delete your location history so that it's no longer stored with Facebook.
- Open the Facebook app on your iPhone or iPad.
- Tap the More tab in the bottom right corner of the screen.
- Scroll down and tap Settings.
- Tap Activity Log.
- Tap Filter.
- Tap Location History.
- Tap Clear Location History.
- Tap Confirm.
This deletes all of your stored location histories. If you choose to keep location tracking on in any capacity, you'll probably want to do this purge every once in a while.
How to stop sharing your location with nearby friends in Facebook on iPhone and iPad
If you like the check-in feature of Facebook's location tracking, but don't really want your friends to know that you're nearby, you can turn off just this feature, while still allowing Facebook to track your location (and store it if you don't want to disable Location History).
- Open the Facebook app on your iPhone or iPad.
- Tap the More tab in the bottom right corner of the screen.
- Scroll down and tap Settings.

- Tap Account Settings.
- Tap Location.
- Tap Nearby Friends.
- Turn off the Nearby Friends switch.

0 Response to "How to turn on location services for facebook"
Post a Comment